
It’s cold, baby. The kind of cold that prompts a governor to call off school based on predicted record-low temps.
To some, this is music to the ear (busted). To others, this is a deer-in-the-headlights realization that there is one more day to entertain antsy kiddos. Whichever side of the fence you land on is ok. Mamas don’t judge.
We have a couple of ‘blast from the past’ projects in progress here at home. Discovering the pastimes of your childhood all over with your own babes is like a gift – an excuse to escape for a bit and get young.
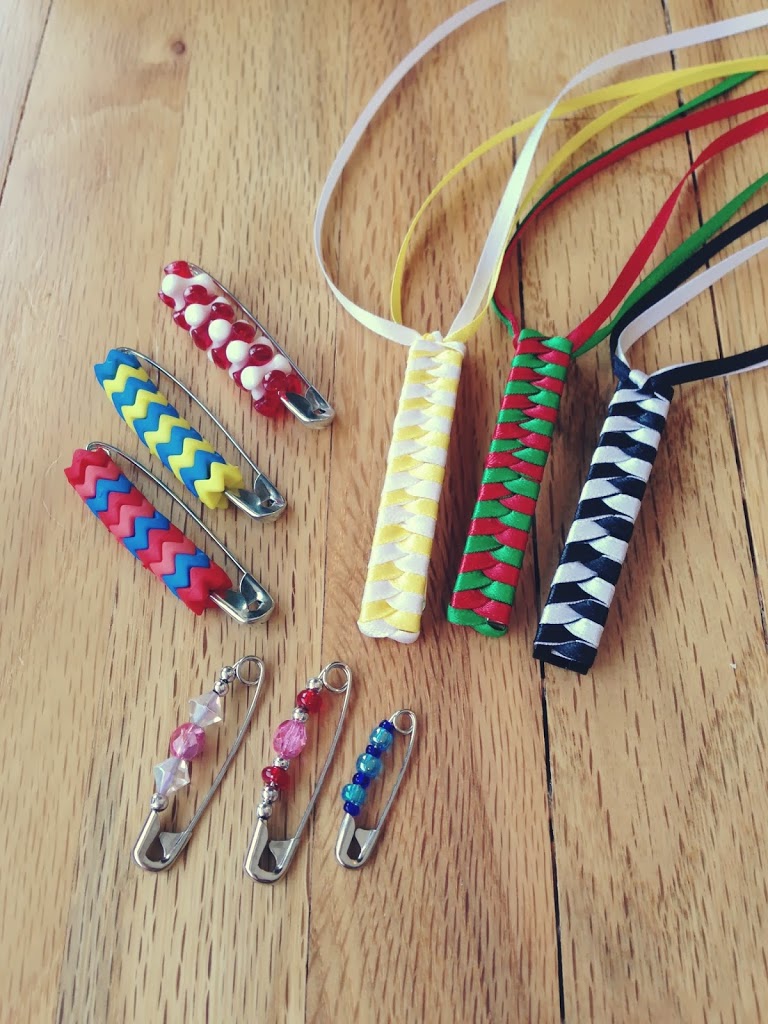
Who wants to be my friend and wear matching pin bracelets???
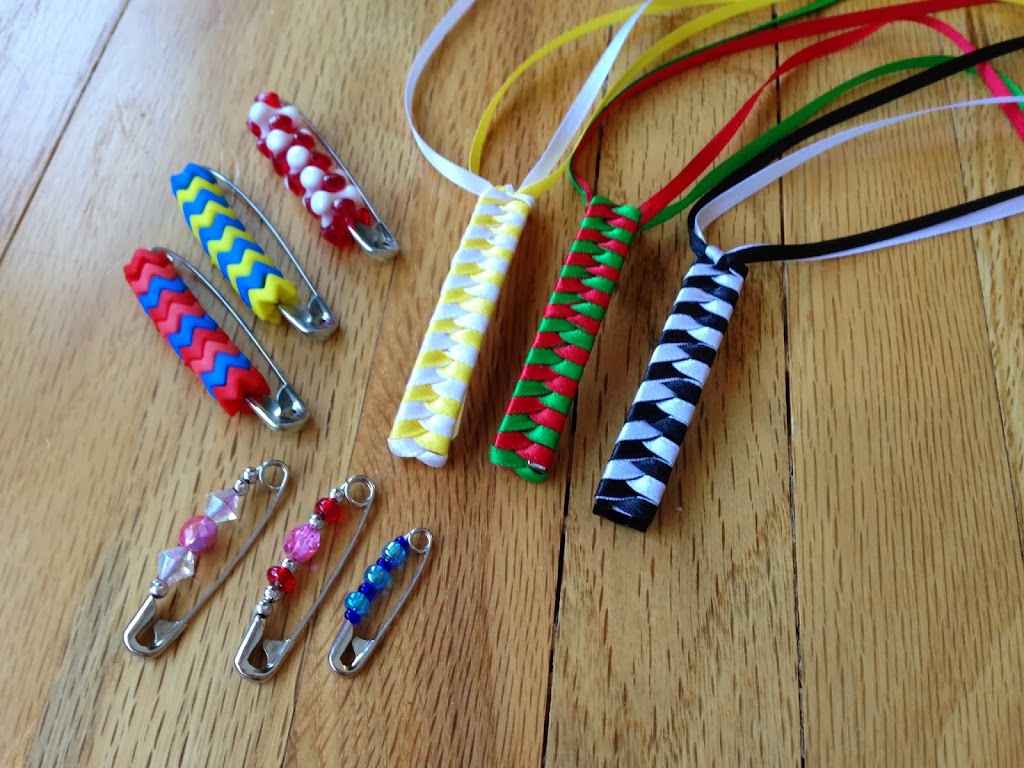
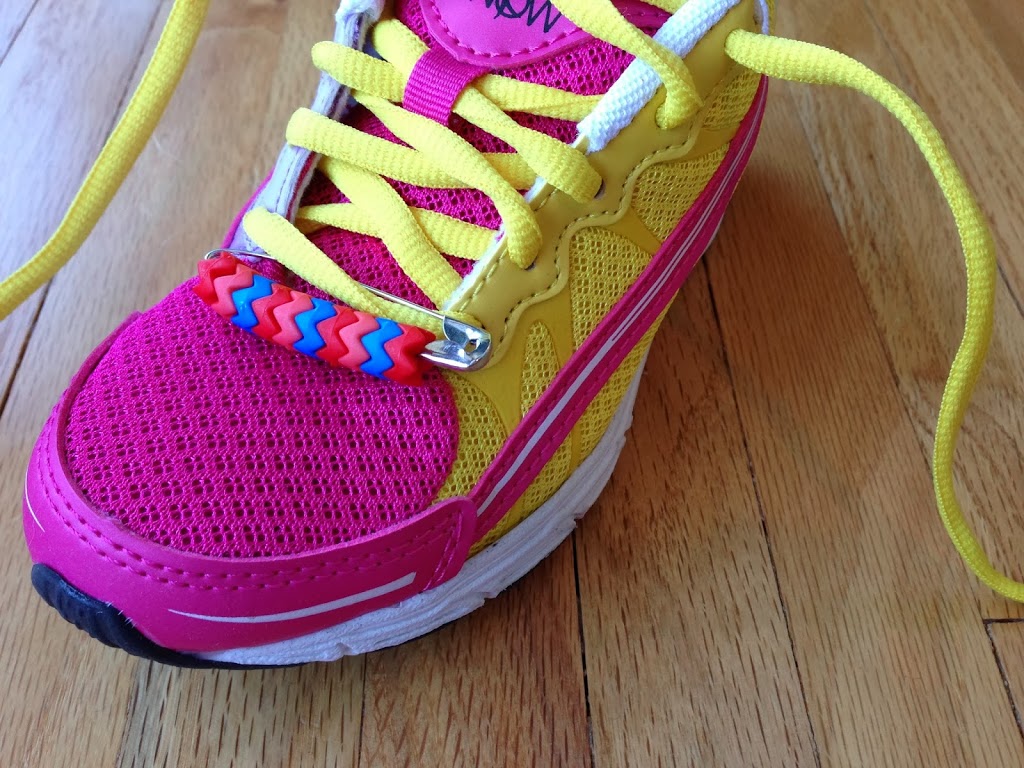
Safety Pins. They weren’t only used to pin our jeans skintight to our scrawny, middle school ankles. We also beaded them and decorated our shoes, clothing, and strung them into bracelets back in the day. This is a super easy craft for kids and a great fine motor exercise. Yes, mama, fun and educational. You’ve overachieved today. Boom.
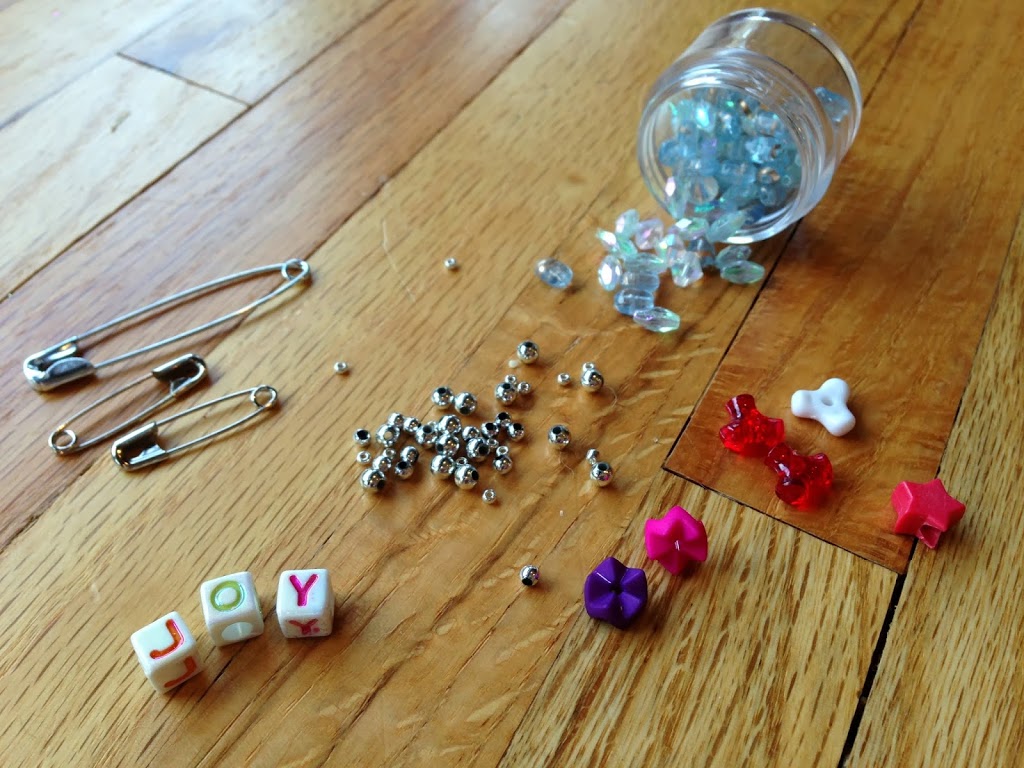
Beads of all shapes, sizes and colors can be used. Pins are available in an assortment of sizes as well. String them on the safely pins and close the clasp. Once you’ve built up a nice stash, thread the ends (non-closure side) on a stretchy elastic beading rope/string. Do the same on a separate string on the closure side of the finished pins. Tie knots and the ends of both strings and slide on your wrist as a bracelet.
We found zigzag beads that throw a Chevron pattern. Love.
We’re bringing these back, baby… just watch for them!
*clearly, keep beads and pins away from the youngest of babes…
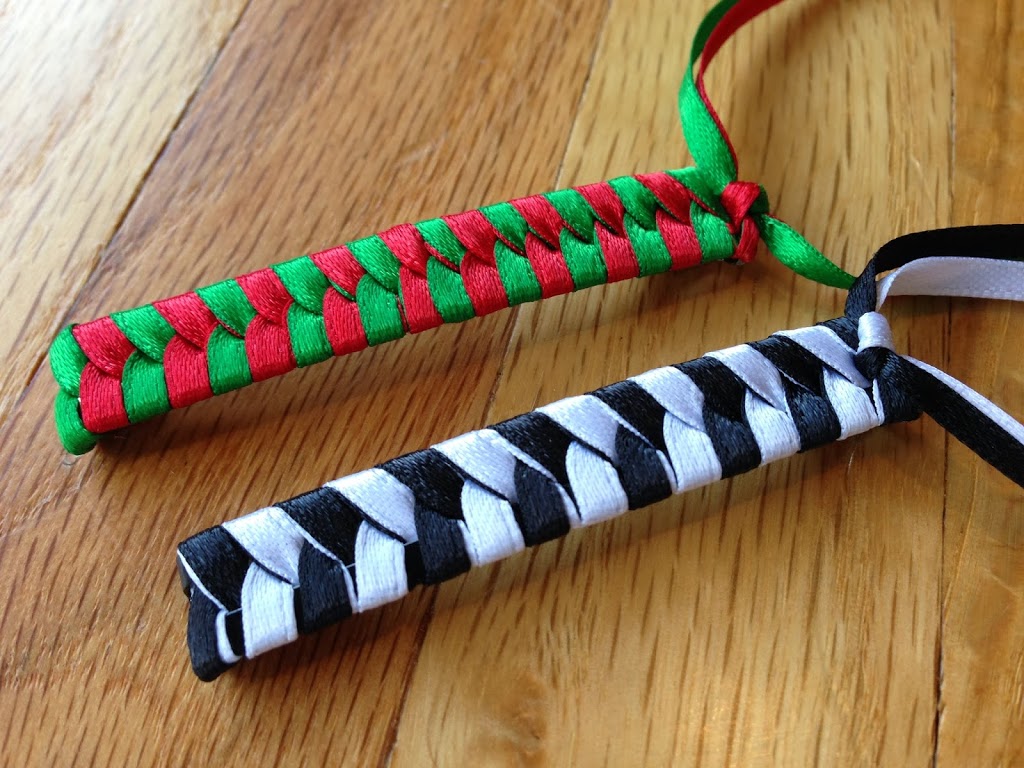
Who remembers tilting their head to the side just enough to swing the tails of your ribbon barrettes (sometimes laced with small bells) over your shoulder to pretend you had longer silky hair?
Nostalgia oozes from these barrettes. I had many – perhaps, every color. Pinning them in my little girl’s hair makes me crazy giddy.
We found the following process to work well:
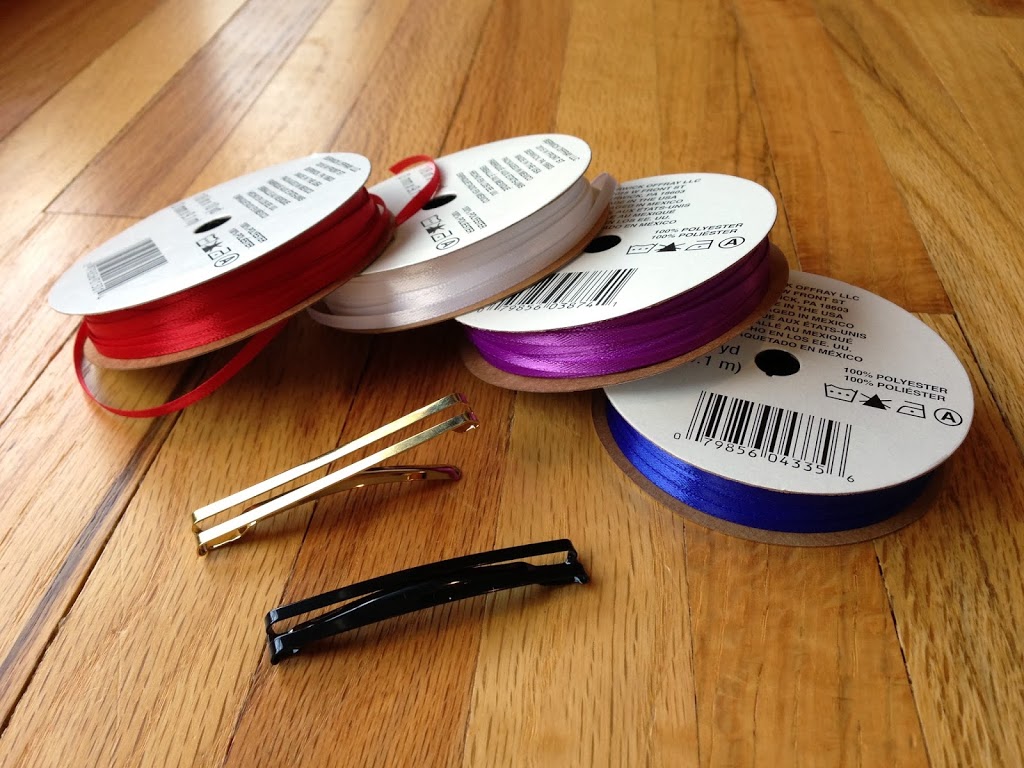
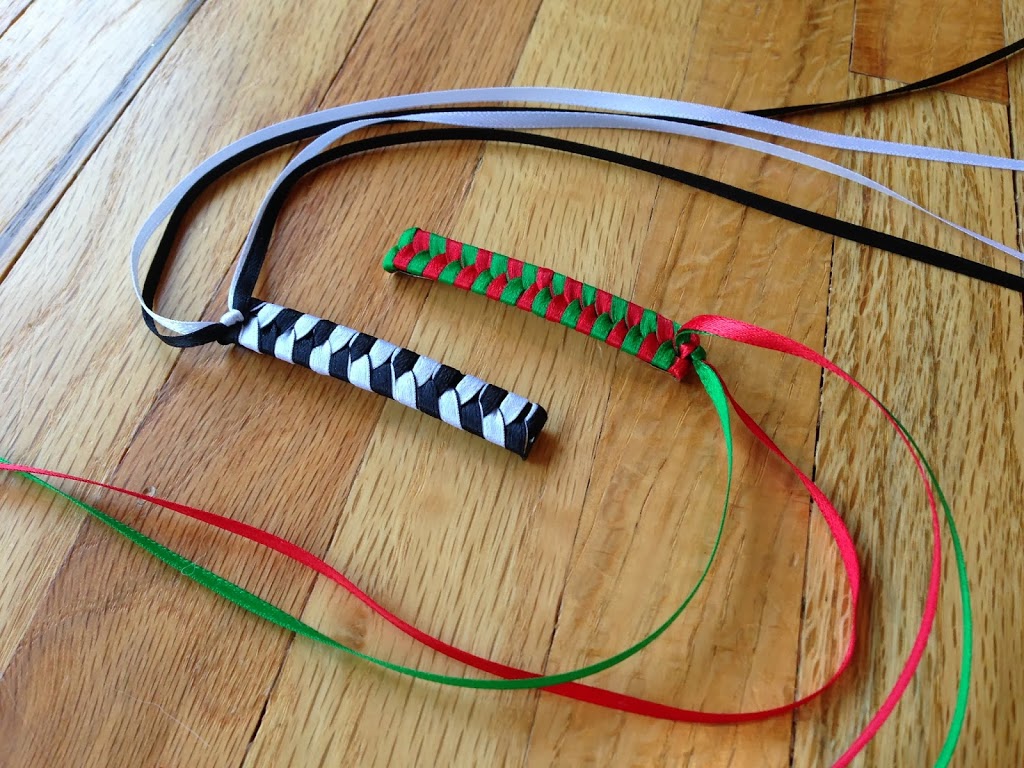
* Use two-barred barrettes. We found them at a large discount store. I had no idea they still sold theses. Score.
* Use 1/8” satin ribbon in two colors. Cut two strings – at least 1 yard each.
* Stack the ribbons on top of each other and hold them behind the curved clasp end of the barrette, leaving equal length tails on each side.
* Take the tails from the left side and thread them over the top of the first bar and under the other. The tails will end up on the opposite side of the barrette – the right side in this example. Take the original tails from the right side of the barrette and thread them over the top of the first bar and under the other. They will cross over the first ‘stitch’ and end up on the left side of the barrette.
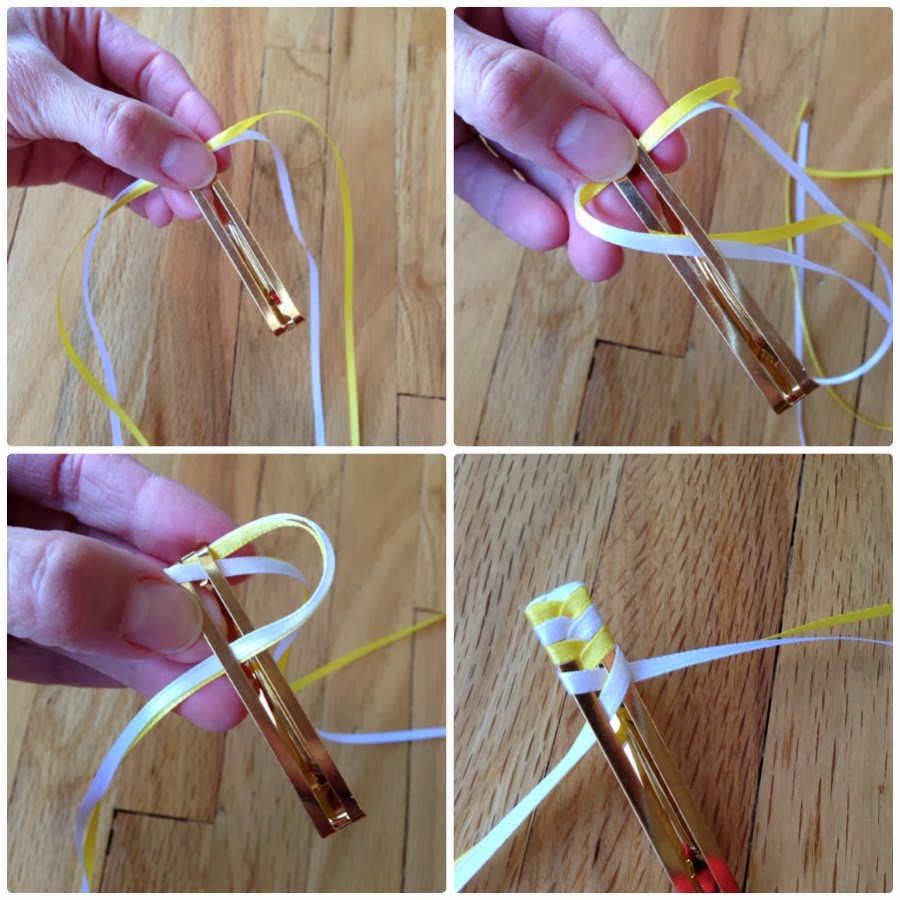
You are basically braiding the ribbons back and forth. Doing so reveals a new color each time the ribbon is flipped over, as a result of threading back and forth.
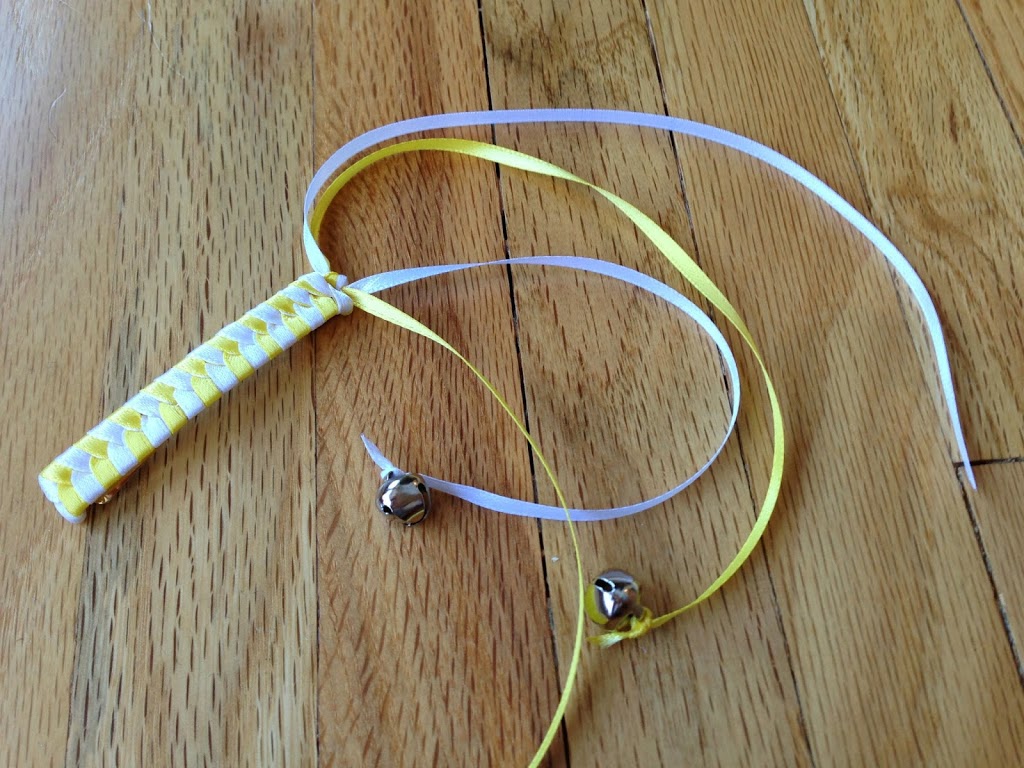
When you reach the end, knot the ribbons tightly. I’ve even added a tiny dob of glue to secure the silky ribbon in a knot. You can add beads or bells to the tails and tie a small knot to keep them in place. If you choose to leave the tails as is, cut them at an angle. You can add a drop of Fray Check – a clear liquid adhesive that dries quickly and prevents fraying. (link to example)
Tag me in any pics you may take and stay strong, mamas! School shall return.
Cheers!
J

 To share this badge on your website copy/paste the code below:
I rocked the pinned pants look!!
Gurrrrl…I was like a bad-ars little pirate with my scrawny ankles wrapped tight. Love it…
Great Post! Thanks for your share! I like reading your post. The Yama Ribbon makes it wonderful!
Do you know where you can get those zig zag beads?
Am I making this harder than it is!?i can’t seem to keep the ribbons in place to even start this barrette!!
Put a drop of hot glue at the top to begin the ribbon cause it seems to help me when I start..
THANK YOU!!! My grandmother made these to match the dresses she made me way bake when but would not show me how to make them when I had my daughter. These are sooo awesome!!! I am going to try to add some feathers, beads & charms!!! LOVE IT!!!