

We all have wishes. We all have worries. Sometimes we wish we didn’t worry so much.
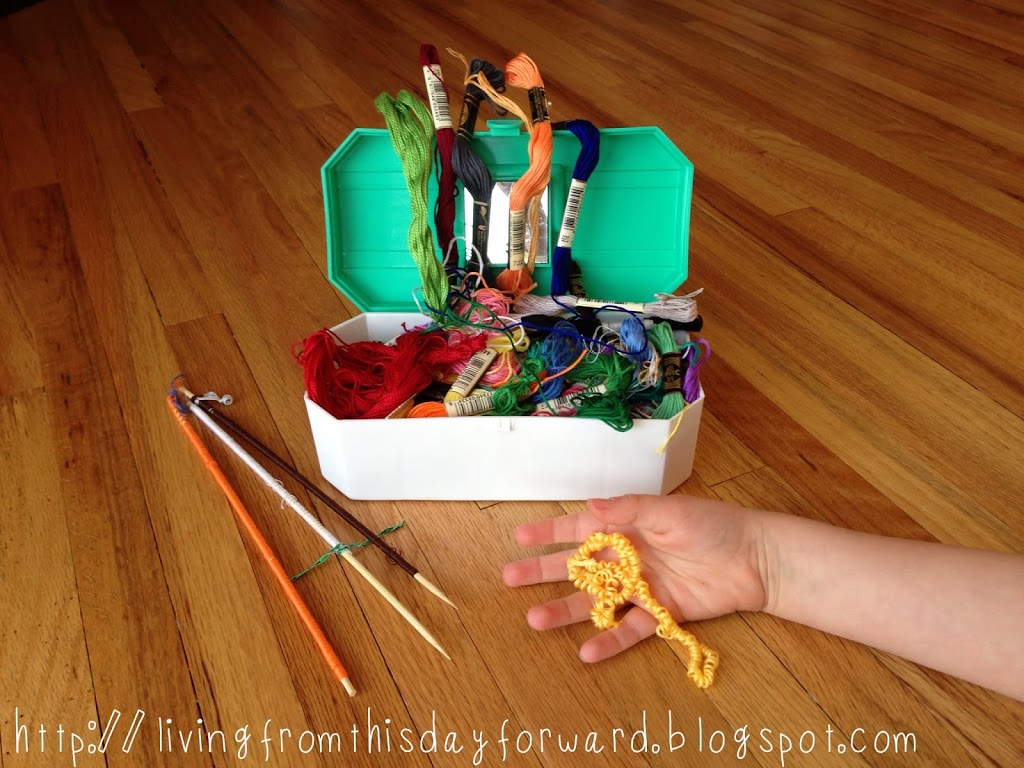
This is a project from my childhood that I took great pleasure in sharing with my own children earlier this year. I stumbled upon these tiny dolls in my storage room in a Caboodle (yes, you know it – small plastic container from your tweens that probably held your royal blue mascara) …mixed in with my stash of colorful embroidery floss. This collection of vibrant string has seen the age of the friendship bracelet, cross-stitched my first 4-H sampler for entry in the county fair, and has woven clothing for little dolls made of Q-tips.
I picked up one of the characters and sat for a few moments, lost in the memories they stirred. I spent many an hour as a young girl creating collections of these little friends – while my mom was sewing away in the background – detailing each personality while experimenting with skin tones, hair textures, and clothing options. Some were fashioned to match or represent my friends and family.
A childhood friend and I once made them to sell at our annual garage sale, alongside the friendship bracelets we labored over and stockpiled for weeks in advance. Little entrepreneurs, we were.
I guess the dolls were my version of the traditional Guatemalan worry dolls gifted to me as a souvenir when I was young…they were brightly-hued bitsy people, said to free you of the worries that you whisper to them in confidence.
I’m a huge fan of working it out…reflecting, sharing feelings – good or bad – with loved ones in an effort to purge the hurts, cleanse the muddies, and celebrate the wins. A clean slate lends itself to fresh ideas. I’m keen on anything that encourages my babes to identify and deal with what’s inside. Perhaps these trustworthy little friends would be a good tool for your little ones to hand off the worries.
I also believe in dreaming big dreams. Verbalizing your dreams and giving them life is the first step to chasing them. I like to think these dolls are great at multi-tasking and capable of big things…so share your worries, whisper your dreams, or make a wish.
Let’s get started. Don’t worry…they’re easy.
Supplies:
- Q-Tips
- Embroidery Floss
- Tacky Glue (thinking I should own stock in this by now…)
- Seed Beads (optional, for eyes)
- Scissors
(why does that arm look so lifeless…?)
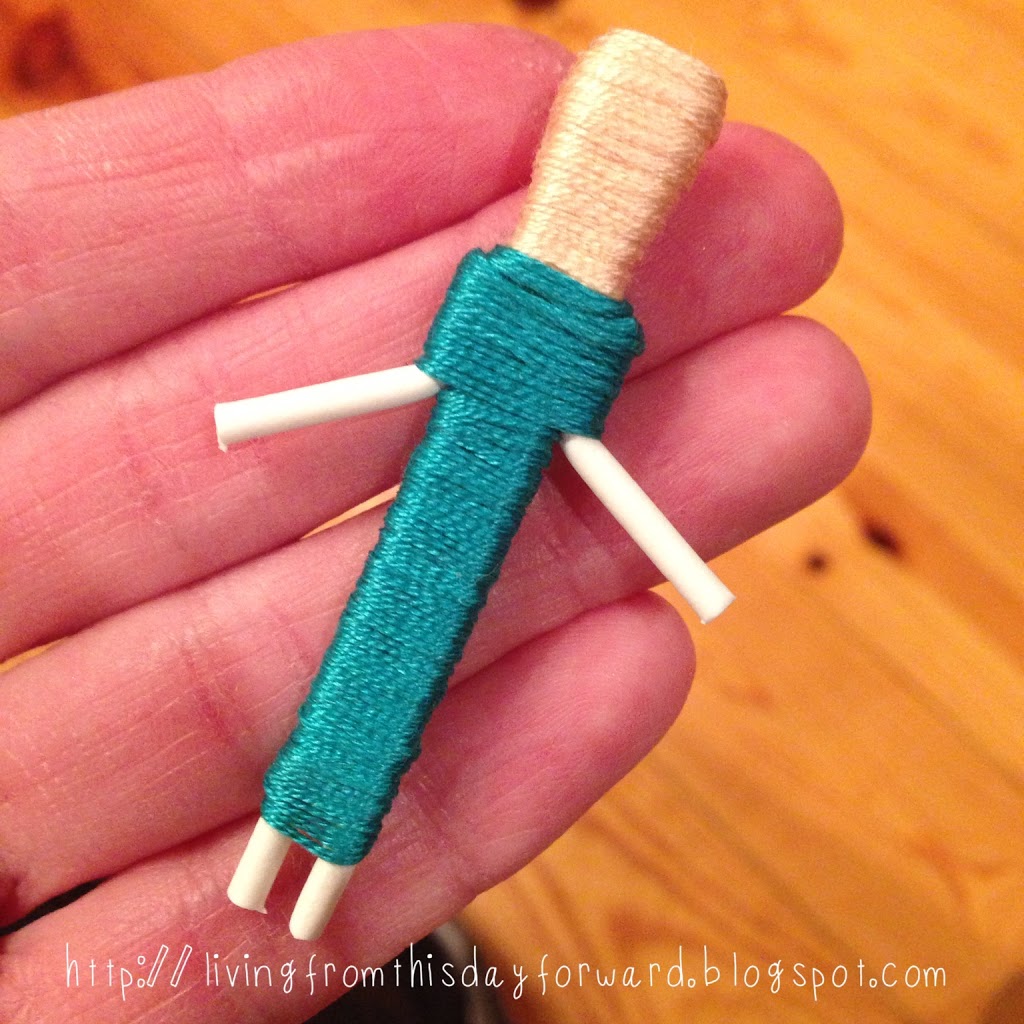
You’ll start by cutting Q-tips to the proportions in the photo below. Glue the pieces together as shown with thin lines of Tacky Glue and let them dry. The fluffy ends of the Q-tips will serve as the head.
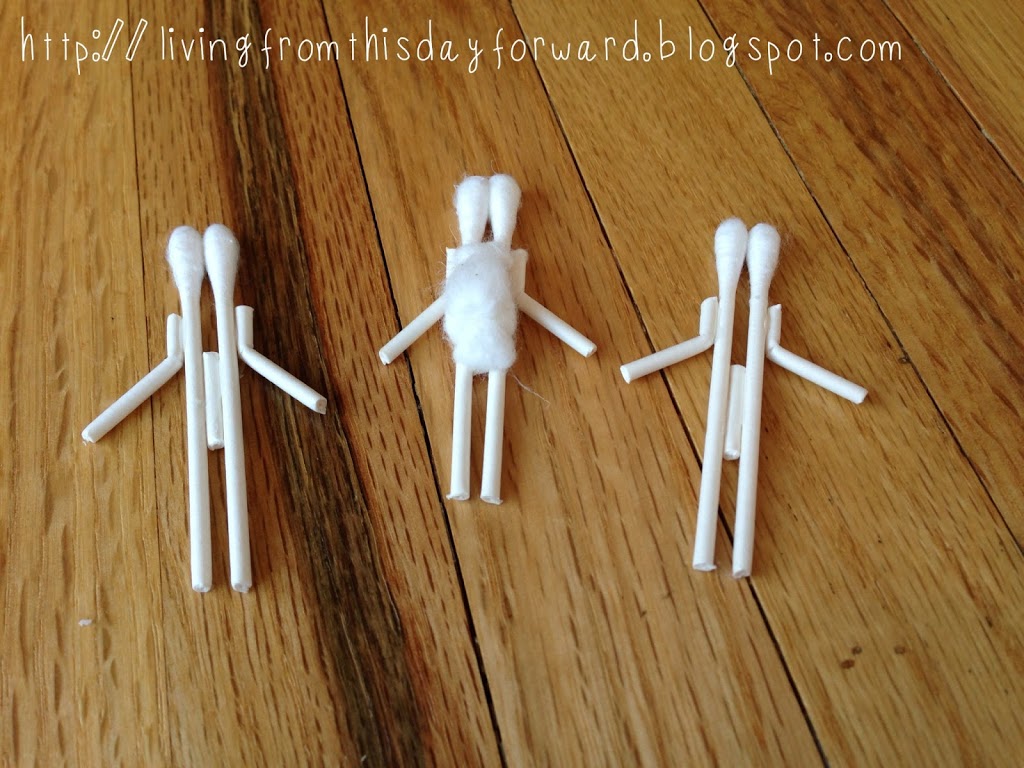
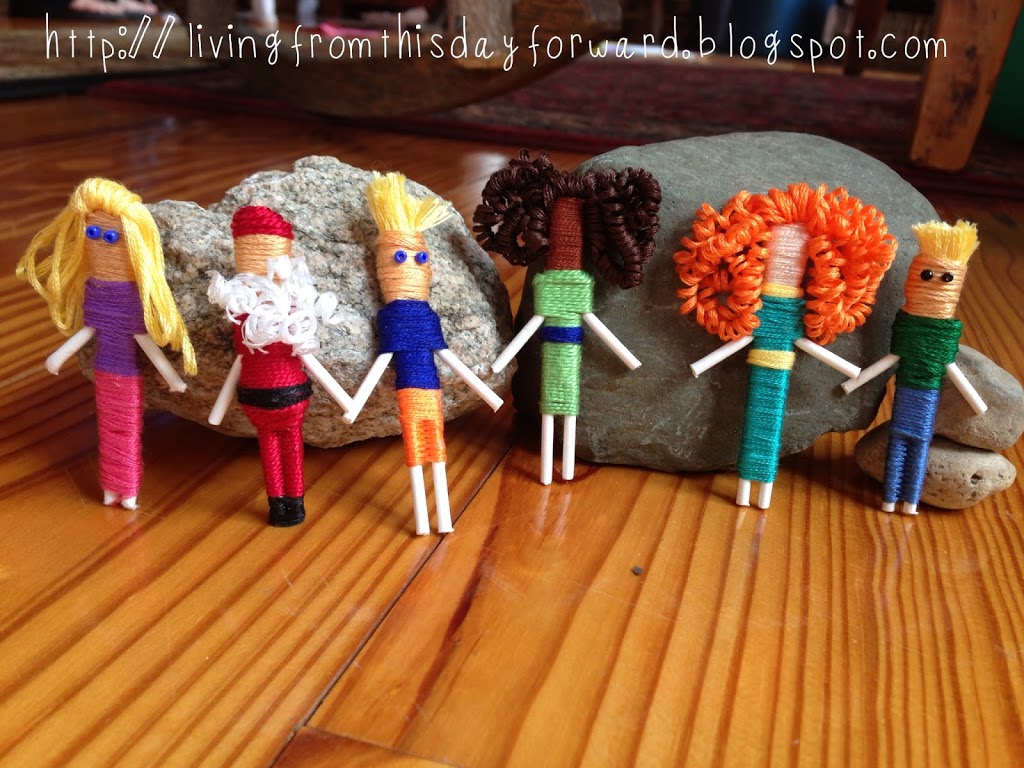
Choose your gender, skin tone, and clothing style. Directions below for detailing your dolls
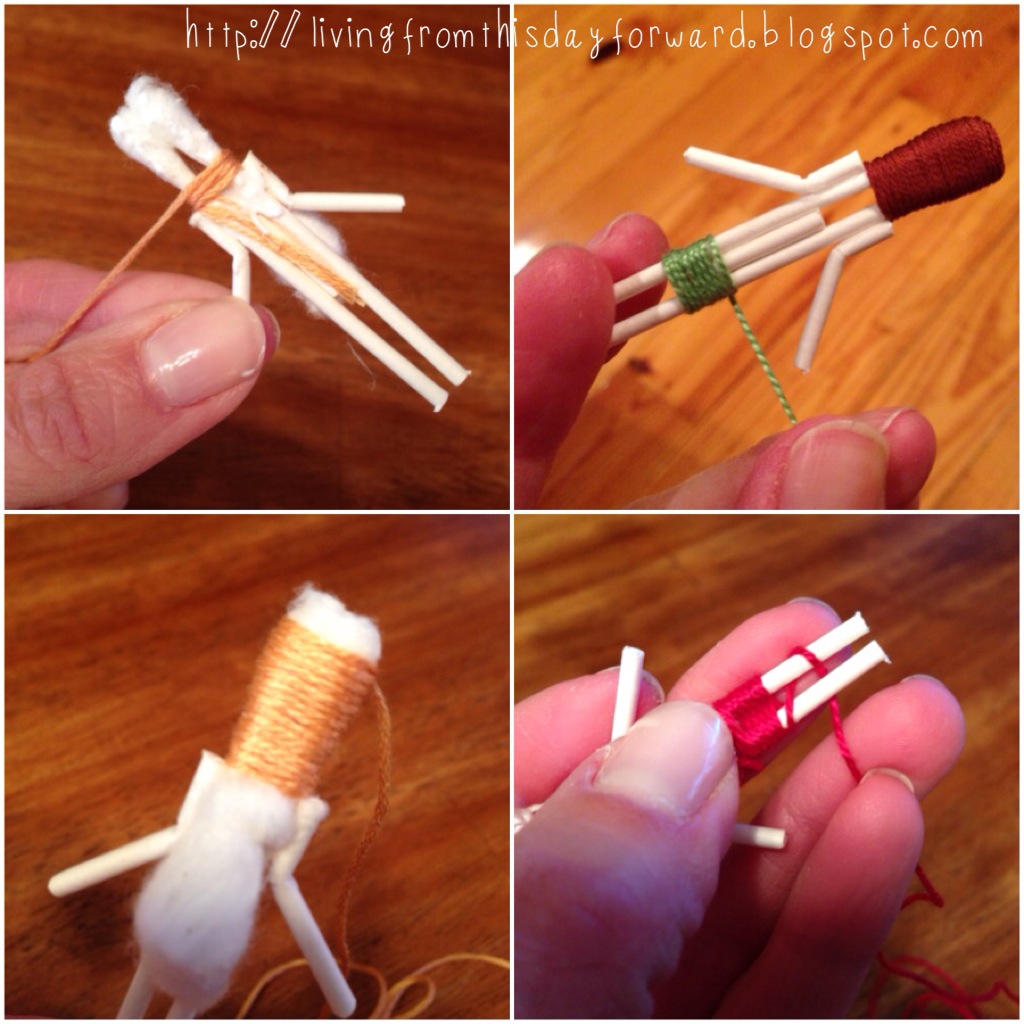
For long hair dolls…start by gluing the end of the embroidery floss just below the neck on the side you designate to be the doll’s back. Hold it down with your thumb while you begin to wrap the floss around the narrow neck part of the doll working your way up, over the fluffy section, row by row until the whole area is covered. Leave a small tail at the end to glue down to the back of the head when finished. You will glue the hair on as a separate piece once the doll is clothed.
For short hair dolls…begin by cutting small segments of floss in the desired hair color, about ¼ to ½ inch long. Glue these pieces to the top portion of the head section first, and then wrap the head in skin tone string (as detailed above) covering the base of these strands to finish. The hair will stand off the top of the head. You can give it a little haircut after the glue dries.
For clothing…you will follow this same stacked wrapping technique. Glue a small tail down to the back of the doll, hold it in place, and begin to wind and wrap the string around the body until covered. Finish by gluing a short piece of string down to the body.
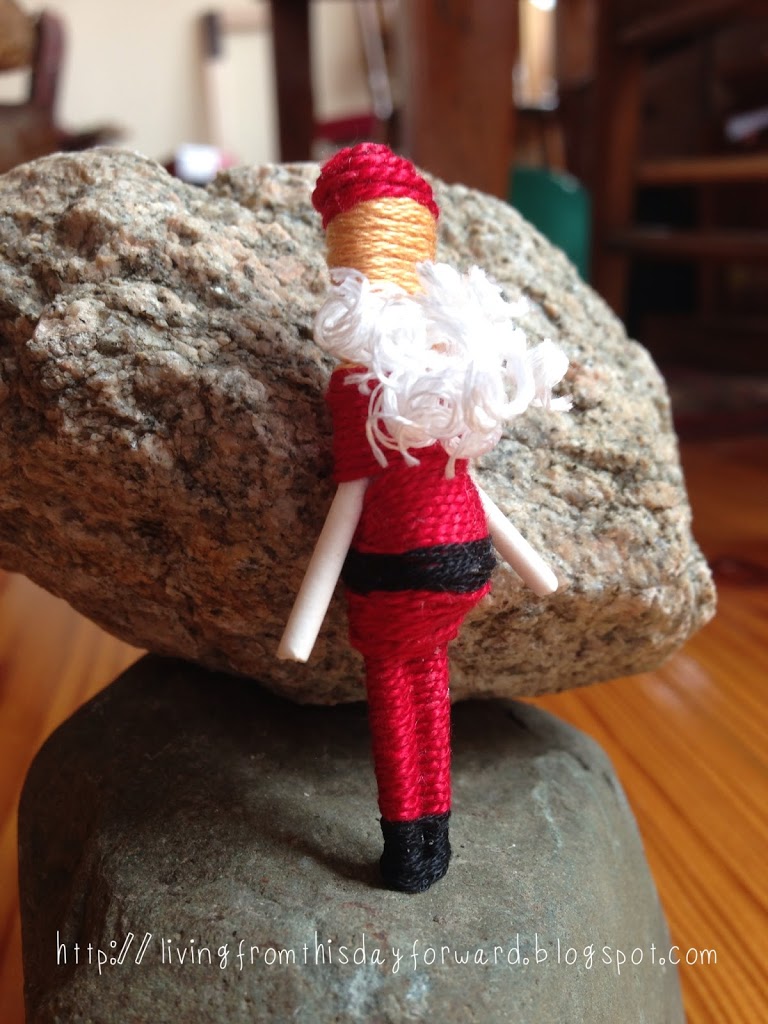
For pants, I begin to wrap the waist section as listed above, but then I weave in and out of the sticks in a figure 8 pattern to give the appearance of separate legs. You can see an example of this in the picture up above with the red string.
Blonde, brunette, redhead…short, long, curly…the options for hair are endless!
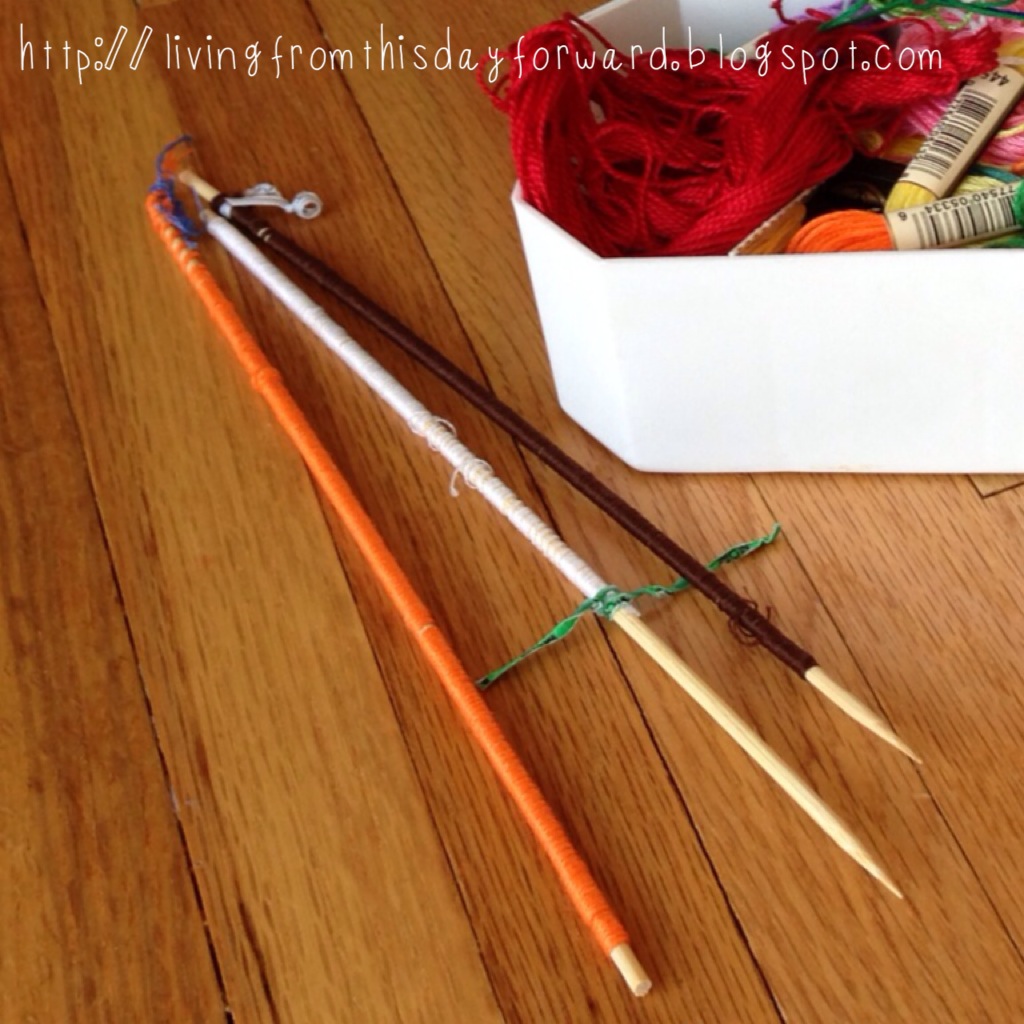
For curly hair, my own Mama taught me to dampen embroidery floss before wrapping it tightly around a wooden cabob skewer. Let it dry completely and you will have springy beautiful curls when you unwind!
Depending on how long you want the hair, wind string around two spread fingers to make a loop in the desired thickness. This will be the length of the hair laying across the dolls head, shoulder to shoulder. You will wind a bit more string around the middle point of this section of floss, just to hold it together. That will be the point in which you glue the gathered hair to the head of the doll.
Little Lady requested a Santa over the holidays. We plumped him up with a couple extra Q-tips on his belly before wrapping. (see middle figure in bare body photo earlier in post) She also requested Merida, from Brave. We let her firey locks flow.
My little guy insisted the dolls have eyes. We rounded up some seed beads….big blues, of course. I prefer the less intense look of the expressionless faces, myself.
Paint and decorate a little wooden box for your dolls and keep them bedside. You can find an assortment of wooden treasure boxes at any craft store and customizing them is a project itself!
Throw your worries to the wind and set your dreams into motion.
Cheers!
J
 To share this badge on your website copy/paste the code below:
Leave a Comment