My lovely friend, Laura, invited me to contribute to the blog promoting her adorable vintage-meets-handmade boutique, Italy Ava. Considering that I had been playing around with my own blog and had not yet found the confidence to share anything, my reaction went something like…Fun!…Scary…Fun!…OK?!
As I do with any new endeavor, I dove in heartily. And surprise…it was fun.
I’ll be sharing a slice of my days with my babes and the things we enjoy together: crafting, playing, and just plain connecting. Here is a look at the first Monday with J post on Italy Ava –
Cheers!
J
Meet our friend J
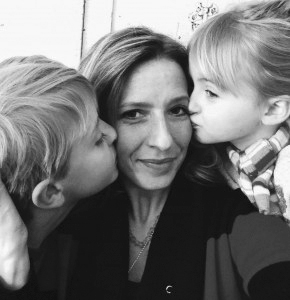
I’m J…a now-single mama of two, who hit a big bump in the road, navigating my way down an unexpected new path one day at a time. My babes are my light and my lens to see the best in everything. We play, we create, we explore, we laugh, we love. The laundry is a little backed up, and dinner may be less than impressive, but our hearts are full and we’ll sleep well tonight. Grab your munchkins and join us for some fun…this is what we’re up to today!
My daughter is one of my strongest creative inspirations. She is whimsical, free-spirited, artistically confident, has a distinct sense of personal style, and oozes creativity. Oh, she also just turned 4. It’s in her blood and I love to see what’s ticking in that beautiful little mind as she heads for the art cabinet. She allows me to relive pieces of my childhood all over again.
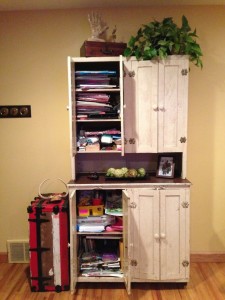
Here is the cabinet. It’s packed. It’s an art hoarder’s dream. It’s bulging with goodies and lacks organization because I simply can’t keep up with the artist.
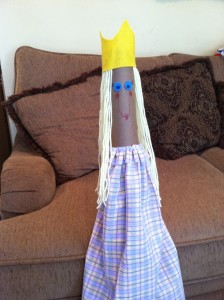
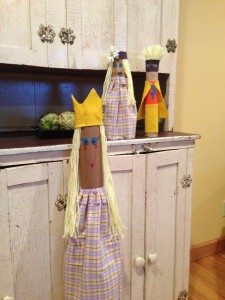
We were nearing the end of Christmas break. We were bored…so we made a friend! Meet wrapping paper roll, Princess Stacey.
Shortly after Christmas my daughter came to me holding one of the two wrapping paper tubes I kept for the kids, for an undetermined craft project. She asked for fabric and tried desperately to explain her grand idea…putting things here and having a thing on the top and adding something there. Her ideas were pouring out faster than she could grasp the words. I said, “you want to make a doll?” Relieved, she said “yes.” And so we began…
Since then, we’ve adapted the project to paper towel rolls for pint-sized pals.
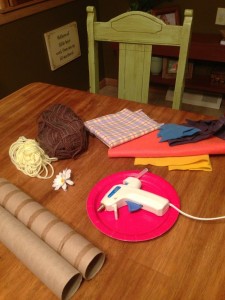
Supplies:
Scraps of fabric
Scraps of felt
Yarn
Glue gun (tacky craft glue also an option)
Markers
Embellishments
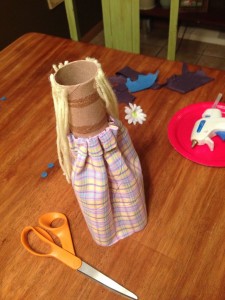
I started by folding over the top edge of a rectangular fabric scrap (think dress) about an inch to create a ruffle accent to the top of the dress. Find the center of the piece of fabric and tack it to the tube with a spot of glue, allowing enough room at the top of the tube for a face (think neck position). Scrunch the fabric a bit toward the center point, in say 1/2″ increments, and tack with glue. Continue around to the back side of the tube creating a gather effect. You have a dress.
For the hair, I wound yarn around the length of my forearm to a desired thickness. For smaller friends, you may scale it back to the width of your hand with fingers spread. I then cut the top and bottom of the loop and divided the yarn into two sections – one for each side of the head. Lay the yarn on the table and spread into an even row. Place a line of glue along the top half of one side of the tube and gently place the row of yarn hair onto the glue (caution: for the novice crafter who may still have feeling in your fingertips…glue may squeeze through the yarn when pressing into place, be careful to avoid burns!)
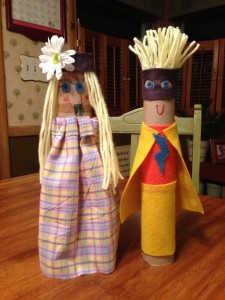
I cut two small circles of felt for the eyes, a crown shape to glue over the rows of hair on the head, and my little lady added the rest of the facial detail with her markers. The ideas are endless…super heroes, fairies, monsters, etc.
All that’s left is to give your new friend a name.
Cheers!
J & babes


 To share this badge on your website copy/paste the code below:
Leave a Comment